
Here are step-by-step instructions for installing Oracle Database 12c Release 1 on Windows 7. This is more or less to install a Desktop version of Oracle 12c. I posted other versions for Oracle Database 11gR1 and 11gR2. While some report that they installation doesn’t work for them, its typically because they didn’t configured their Windows 7 environment.
Here are some Windows 7 configuration caveats before you perform this installation, and they are:
Windows 7 Configuration Steps
- Make sure you have at least 3 GB of memory on your Windows PC, or that you can allocate 4 GB of memory to your virtual machine for Windows.
- Install Oracle’s JDK 7 for 64-bit OS with NetBeans and 32-bit OS when running on a 64-bit machine. The installer is smart enough to only install NetBeans once. The JDK 7 32-bit installation supports SQL Developer.
- Disable Microsoft’s User Access Controls (UAC). I blogged about a set of Windows 7 gripes, and the second point shows you the screen shots that let you disable UAC on Windows 7.
- Configure your
C:\Windows\System32\drivers\etc\hostsfile. Use lines 1 through 3 when you’re using a DHCP IP address, and lines 1 through 4 when you’re using a static IP address. If you want to set a static IP address, check this old post on how to set a static IP address. Please note that thehostnameneeds to be lowercase.
- Create a user account name that doesn’t have a white space, like
McLaughlinMin the screen shots, and assign it Administrator privileges. During the install, you’ll be prompted to create a non-administrator account to start Oracle.
Oracle Database 12c Release 1 Installation Steps
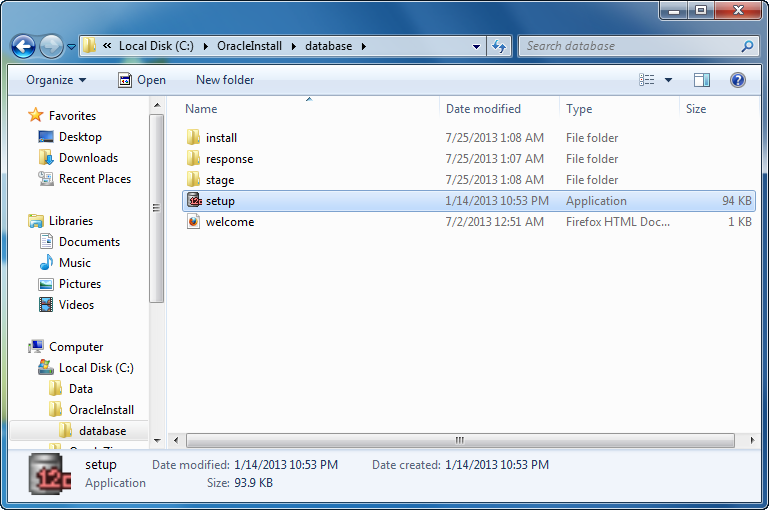
- The first thing you need to do is unzip the two zip files into a common directory. I’ve chosen to create an OracleInstall folder. Oracle creates a database folder inside it. Within the database folder, click the Setup file to launch the Oracle Installer.
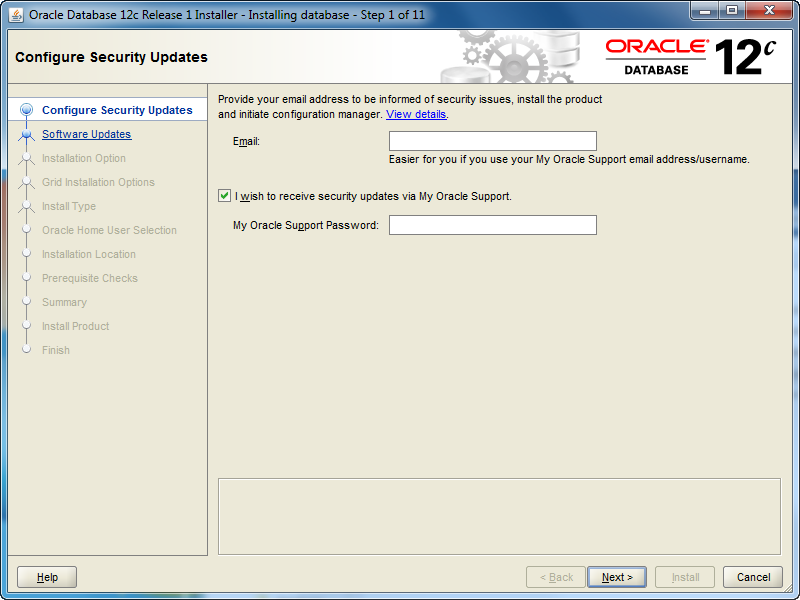
- After launching the Oracle Installer, the Configure Security Updates screen is your first stop. You may provide your email (attached to your Oracle Support Contract) and Oracle Support password, or uncheck the box and you can simply install a Desktop test environment. Click the Next button to proceed.
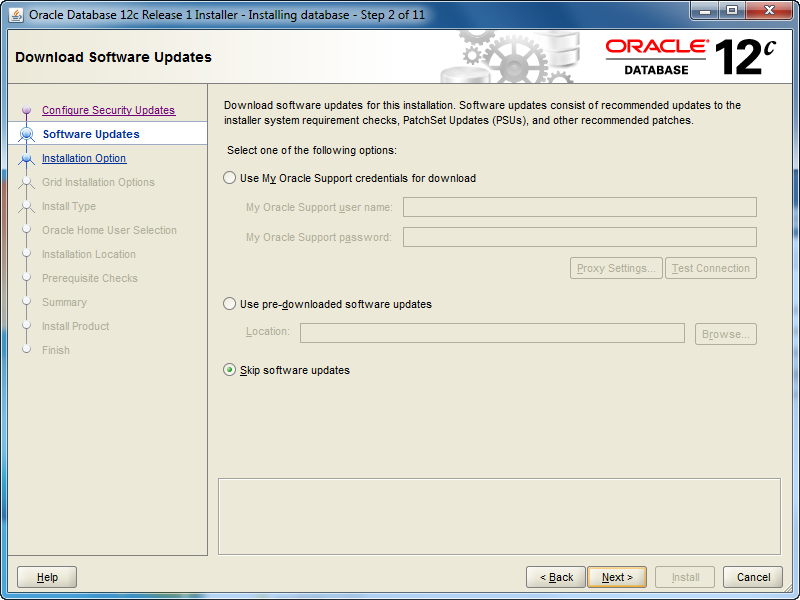
- The Software Updates is the next screen. If you want to check for updates, click and enter your Oracle Support credentials. If you want to install the base release, click theSkip software updates radio button. After making a choice about what you want to do with updates, click the Next button to proceed with the install.
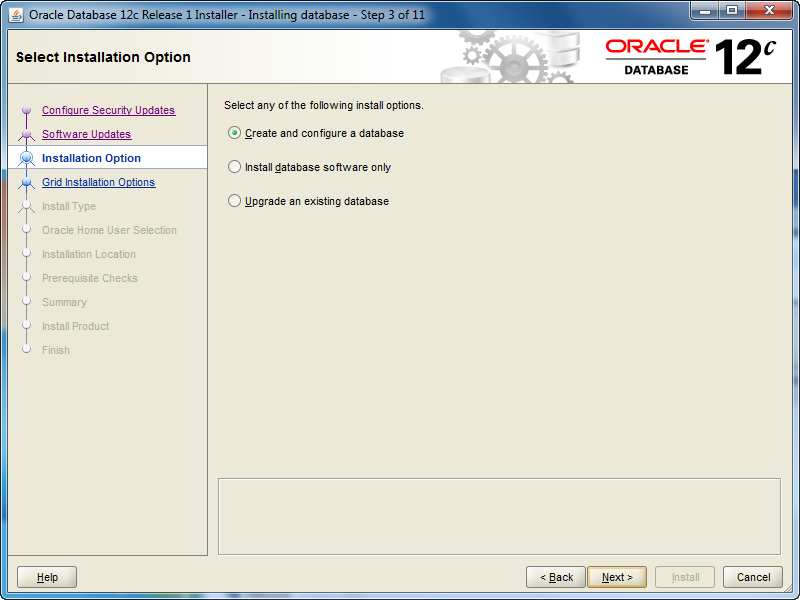
- The Installation Option screen lets you chose whether you want to Create and configure a database (sample database), Intall database software only, or Upgrade an existing database. Check the appropriate radio button and then click the Next button to proceed with the install.
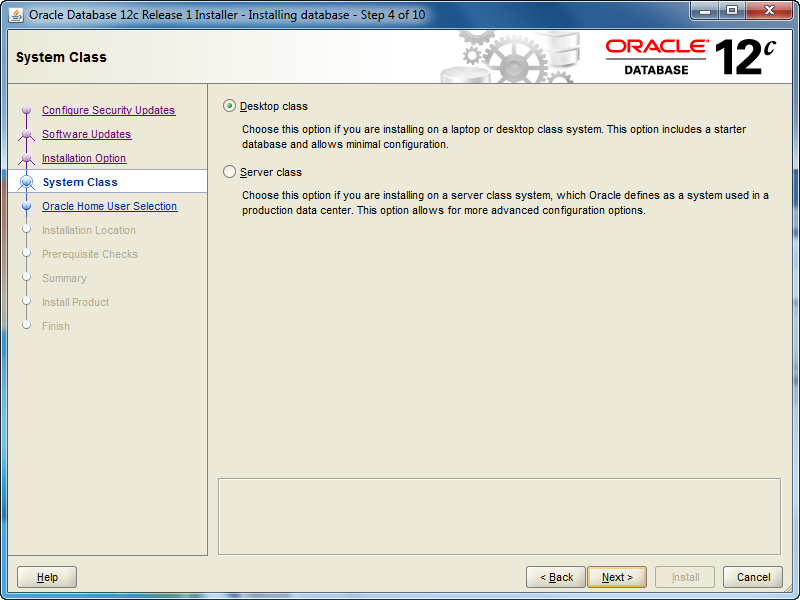
- The System Class screen lets you chose whether you want to install a Desktop class(ideal for develoers to play around in) or a Server class. Check the appropriate radio button and then click the Next button to proceed with the install.
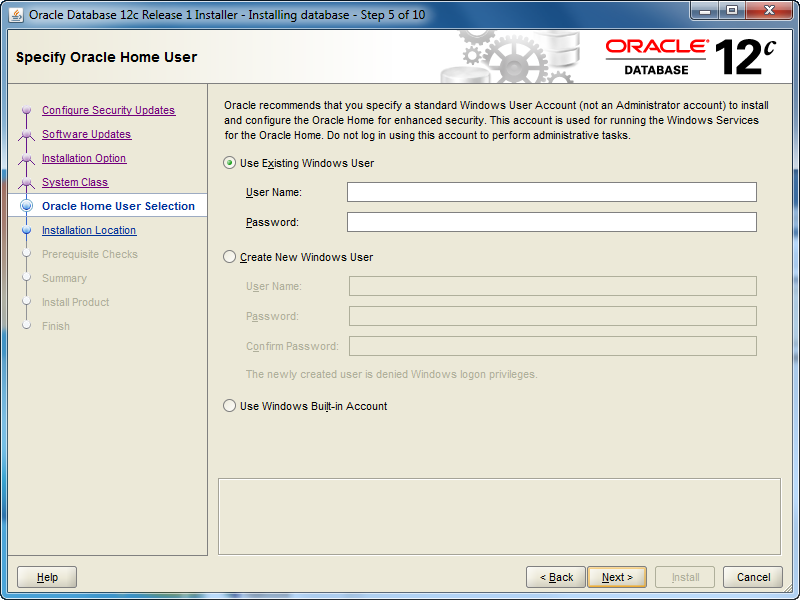
- The Oracle Home User Selection screen lets you chose whether you want to Use Existing Windows User (that’s fine if you created one previously), Create New Windows User (what I’ll do next), or Use Windows Built-in Account. Check the appropriate radio button and then click the Next button to proceed with the install.
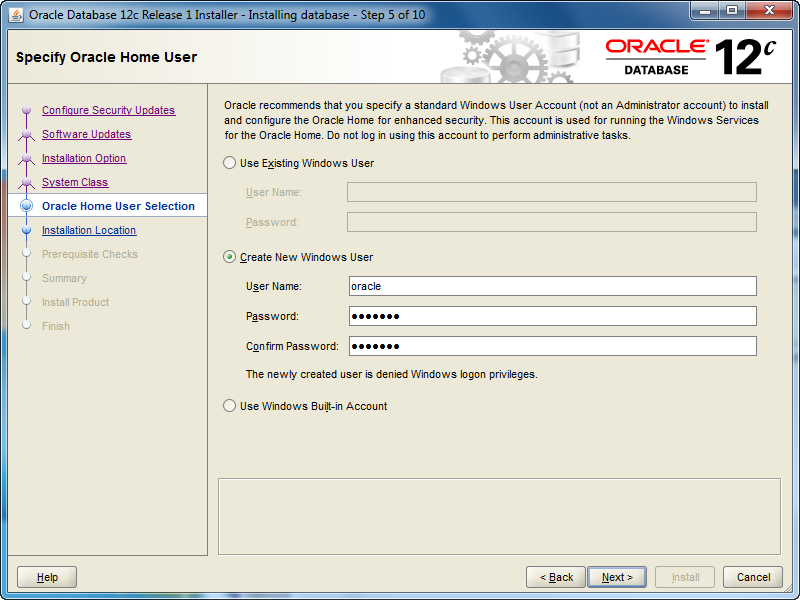
- The Oracle Home User Selection screen lets you Create New Windows User, and that’s what I’ve done with the
oracleuser (it could be whatever you like). Click the Nextbutton to proceed with the install.
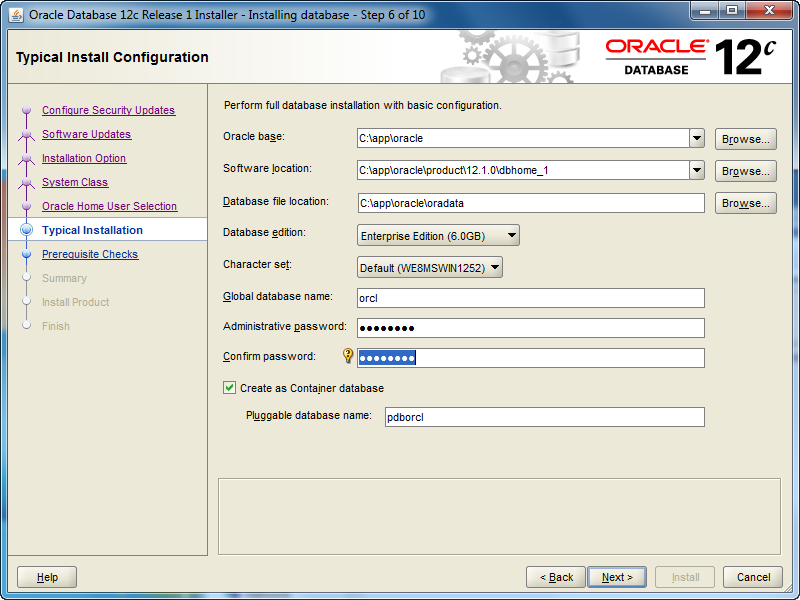
- The Typical Install Configuration screen lets you customize your installation. I’ve only opted to provide an Oracle compliant password while accepting the defaults. Click theNext button to proceed with the install.
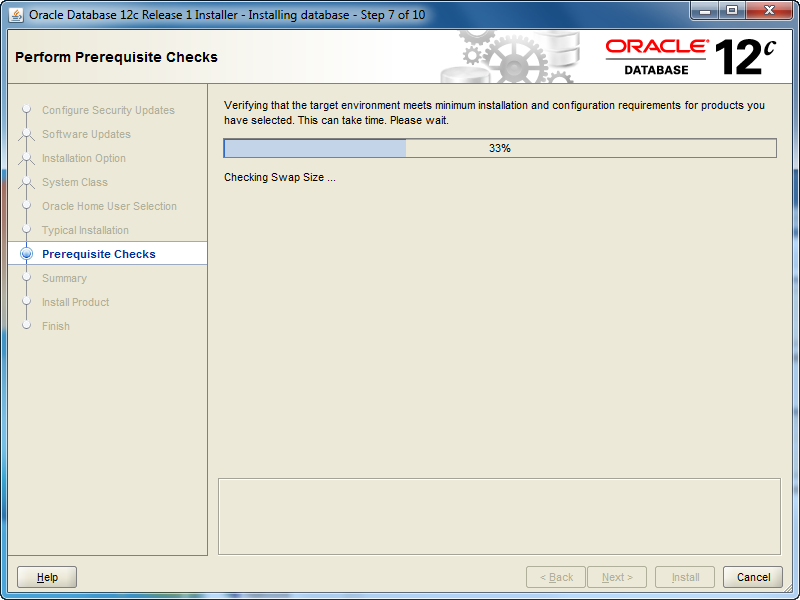
- The Perform Prerequisite Checks screen initially displays a task bar. You need some patience, it’ll show you the next screen if everything is fine.
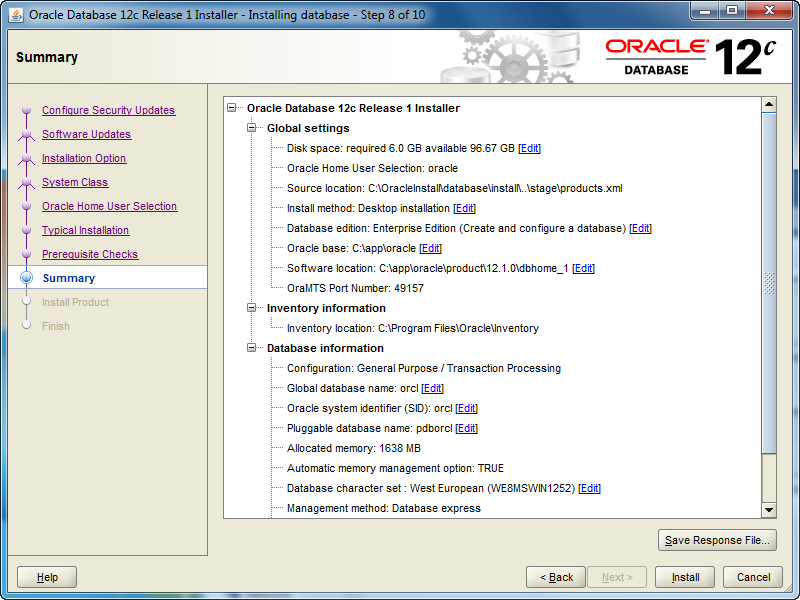
- The Summary screen tells you what you’re going to install. Read it over, save a copy for later, and when everything is right then click the Next button to install.
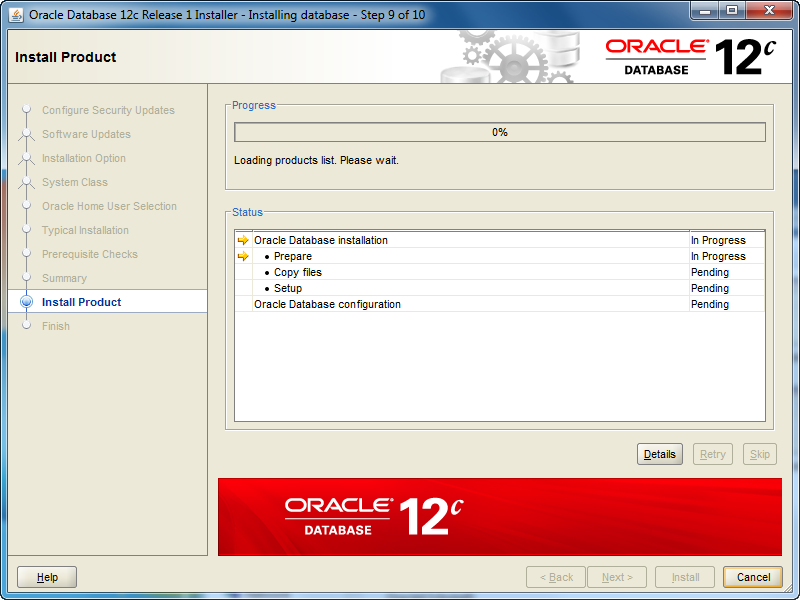
- The Install Product screen tells you what you’re installing and it can take some time. Don’t walk away too quickly because you’re most likely going to have to allow access for the installation to complete successfully.
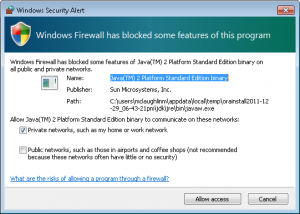
- You should see two Windows Security Alerts with the installation. Click the Allow access button to continue successfully.
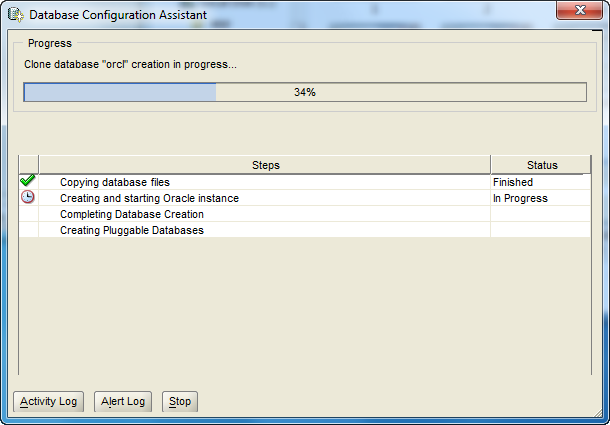
- The Database Configuration Assistant screen tells you that you’ve been successful to this point. Although, this is where several errors can occur when you failed to correctly configure Windows 7 before installation. This takes some time to run, here’s where you can take a break.
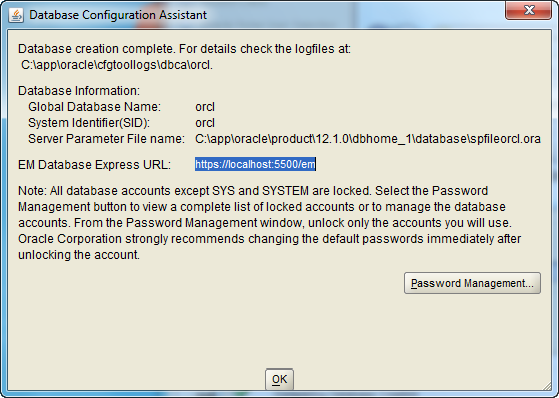
- The second Database Configuration Assistant screen lets you configure passwords for the database accounts. I’m skipping that by accepting the defaults and clicking theOK button to proceed.
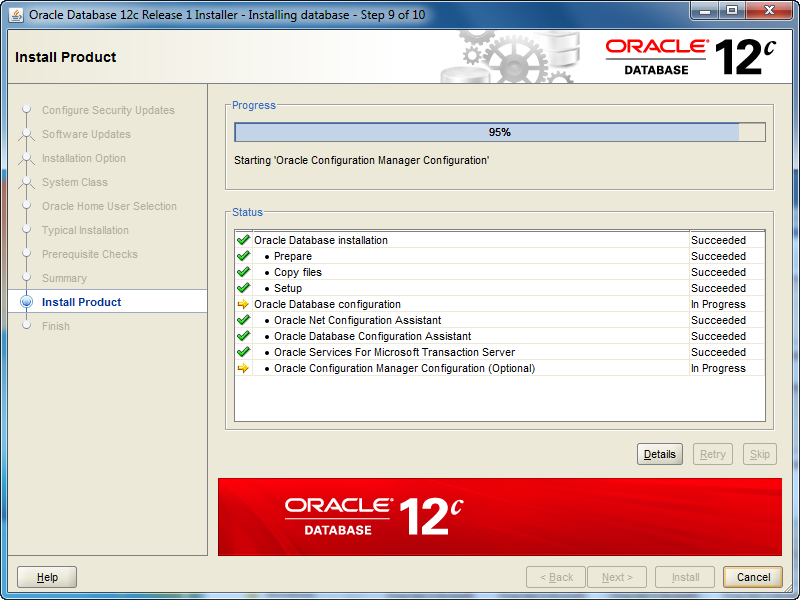
- The Install Product screen reappears while most of the database cloning operation has finished. At this point, it starts configuring the Oracle Enterprise Manager (OEM). It can take a couple minutes to complete. Simply monitor it.
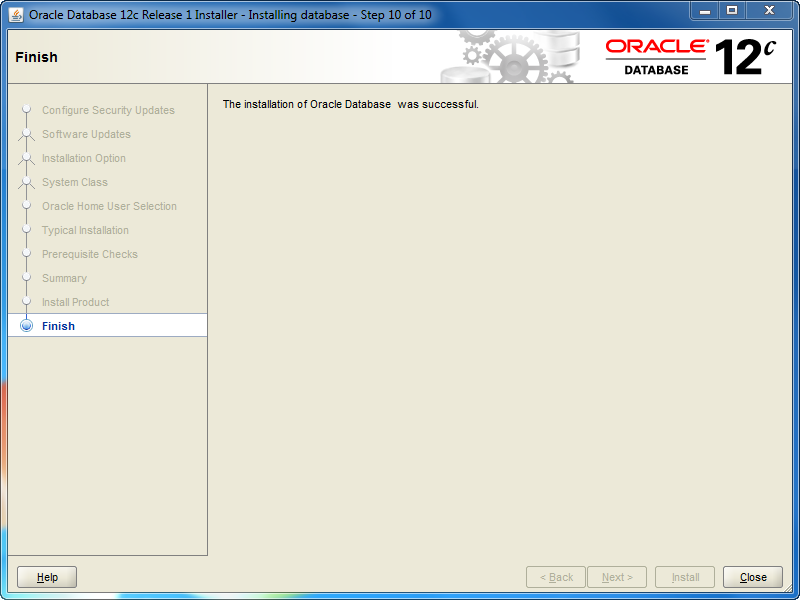
- The Finish screen appears after everything has worked. Click the Close button to finish the install.
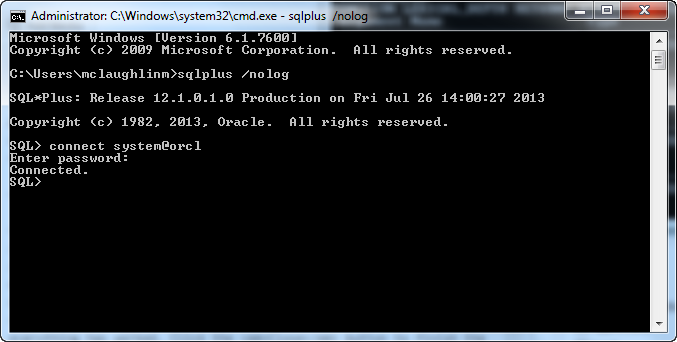
- Now, you can open a Windows command shell and call the
sqlplusexecutable with a/nologoption (denies login credentials form OS history files). Then, you can connect using the TNSorclalias, which verifies your networkinglistener.oraandtnsnames.orafiles are setup correctly. You should see the following in the command shell when the installation was successful.
Oracle 12c changes the dynamics on users. You now have two types of databases. One is a Container Database (CDB) and the other is a Pluggable Database (PDB). While Oracle’s default container users, like
SYS, SYSTEM, and so forth, remain unchanged, you create new CDB users with a C##<user_name> preface. PDB users are a different matter, and they can retain the same format used previously for user-defined users. You set PDB users as the ADMIN user for a pluggable database when you provision it.
Subsequent to this post, I’ve posted how you can provision an Oracle 12c Pluggable Database (PDB), and you can find it in this post. AS always, I hope that this helps those trying to find a quick shortcut on reading the instructions. 
makasih buat informasinya..:)
BalasHapussama2
HapusGan, bedanya CDB & PDB apa ya?
BalasHapusKetika saya coba create user :
CREATE USER superman1 IDENTIFIED BY superman1. ;
Muncul error :
Error at Command Line:1 Column:13
Error report:
SQL Error: ORA-65096: invalid common user or role name
Apa krn saya install dgn checklist "Create as a container database"?
Terimakasih utk bantuannya.